I was thinking today, if I were on a deserted island and could only take one online learning tool with me to make teaching lessons easier, I would take Google Slides. Seriously though, Google Slides has probably been one of the most helpful resources for classroom management and organizing all the things.
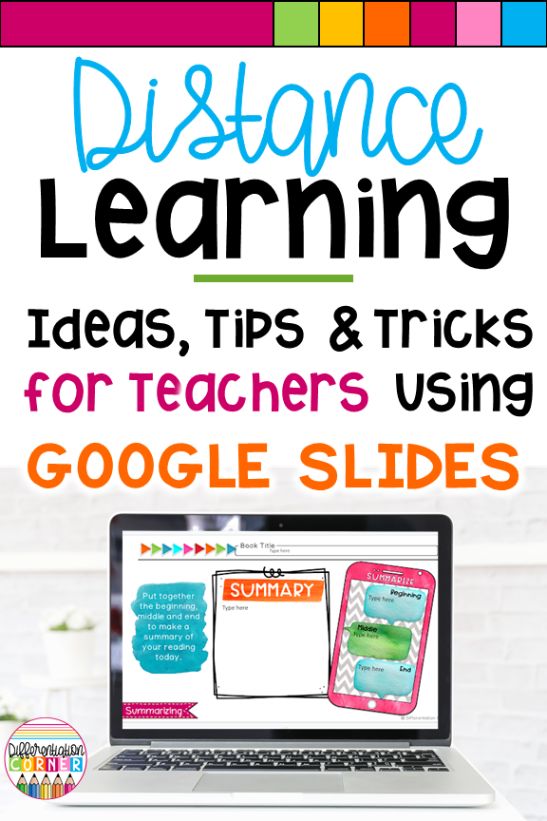
The Google Slides app is so versatile with so much potential. Plus it’s perfect for assigning in Google Classroom for student work or sharing your screen for teaching new content in your classroom or even Zoom or Google Meet classes! They can be used for templates, reading, spelling, writing, math, games, centers, digital newsletters and so much more! In this post, I will be sharing some easy ideas and tricks for teachers using Google Slides templates.
Adding a Bitmoji, Avatar, or Picture on Your Google Slides
Who hasn’t heard of the ever adorable Bitmoji? So, I am definitely late to the party for this trend, but I am here now! It really is pretty simple to add to your Google Slides for a personal touch. If you don’t like Bitmojis or just want something a little different, you can always use a real photo of yourself and remove the background with the remove.bg website!
First, you will need to download the Bitmoji Chrome Extension, if you don’t already have it. Doing this will install an icon on your browser bar. Click on the tiny green icon and select the Bitmoji you want. Drag and drop it onto your slide. (Pro tip- if you are needing a plain Bitmoji with no text or clip art, type “pose” in the search!)
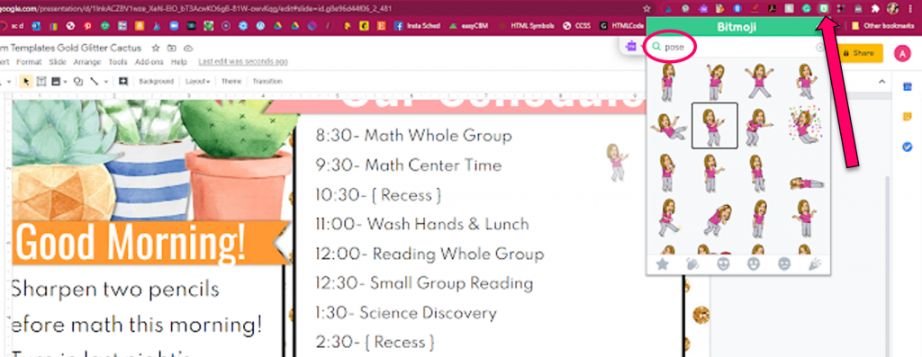
The Bitmoji I wanted to use was facing the opposite direction of my text I wanted to emphasize. I selected it anyway, clicked the format tab, format options, then clicked the flip icon. I’m not going to lie. I had to try a couple of icons before I got it to flip the right way.
Linking Other Slides, Files or Websites for Distance Learning
I love this tip for teachers creating interactive slides for their classrooms! This trick is amazing for teaching science and social studies where so much content is covered. Another great place to use this Google Slides idea is choice boards where students can choose the order of their activities. You can also add numbers or arrows to choice boards to show students the correct order of activities. Some links can lead to outside websites like edpuzzle, an online article to read, or a game to practice math or spelling skills etc. Other links are considered internal. This means they link right within the same Google Slides project. Internal links are great for interactive tables of contents pages in slides.
First, you will highlight the text or shape you want students to link. Then right click to get this drop down menu. Select link.
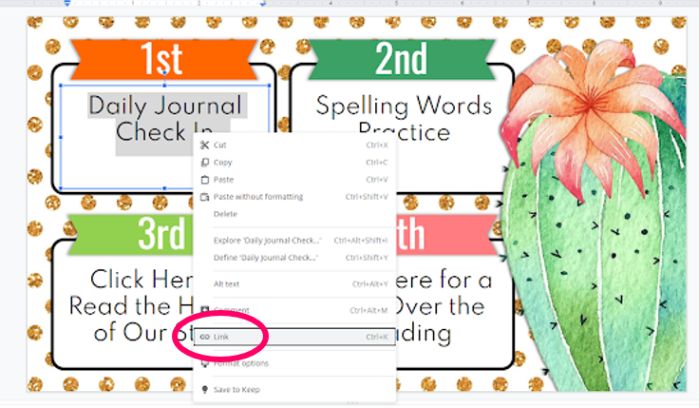
To link within the presentation, scroll down and select the slide you wish students to navigate to.
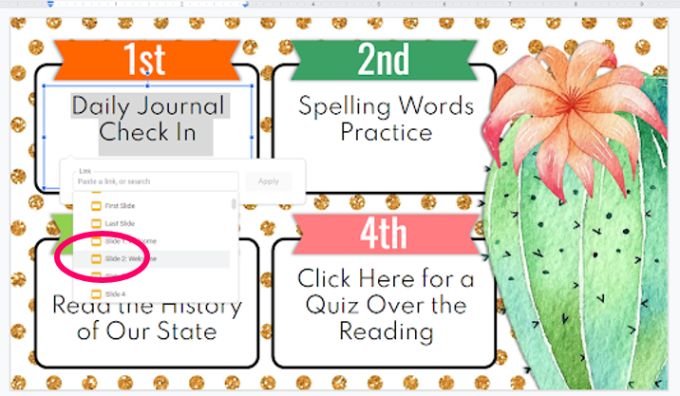
Then click the yellow apply button. DONE!
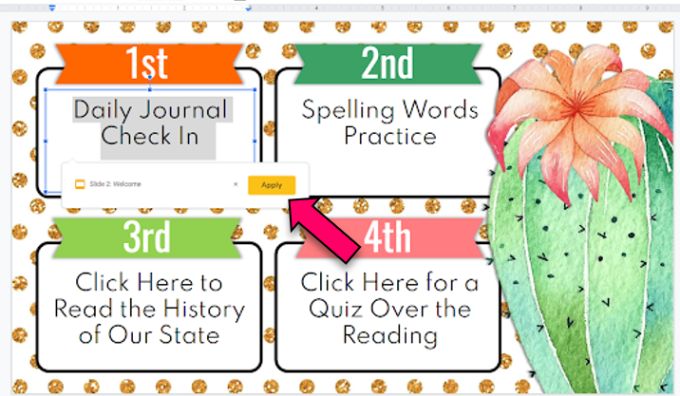
To link to an outside site or file within your Google Drive, first copy the URL or web address from the source your students need to get to. Then go back to your Google Slides, highlight the text or shape you want to link. Right click and select link from the drop down menu and paste the web address. Click the yellow apply button. DONE!

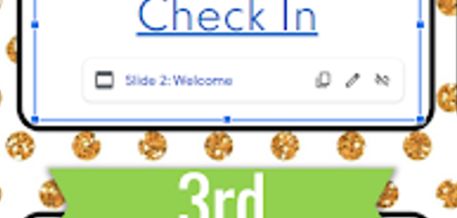
To access the links, click on the linked object or text. Click on the blue text. Clicking on the first icon will copy the link, the second icon will edit the link (allow you to change the slide or URL), the third icon will allow you to remove the link.
Voice Type Speaker Notes
Perfect accommodations for special education students dyslexia & dysgraphia or other learning disabilities! This is a great way to get your struggling writers and readers the support they need during distance learning. The Google Docs app already has voice typing built in and it’s a great tool that is easy to use. I am hoping that before long, the Google Slides app will add voice typing for text boxes. But for now, in Google Slides we have to use this work around. Below the slide, there is a place for speaker notes just like in PowerPoint. Most of the time, this section is shown when you open the app. Sometimes you have to drag up on the three dots directly under the slides to access the speaker notes area.

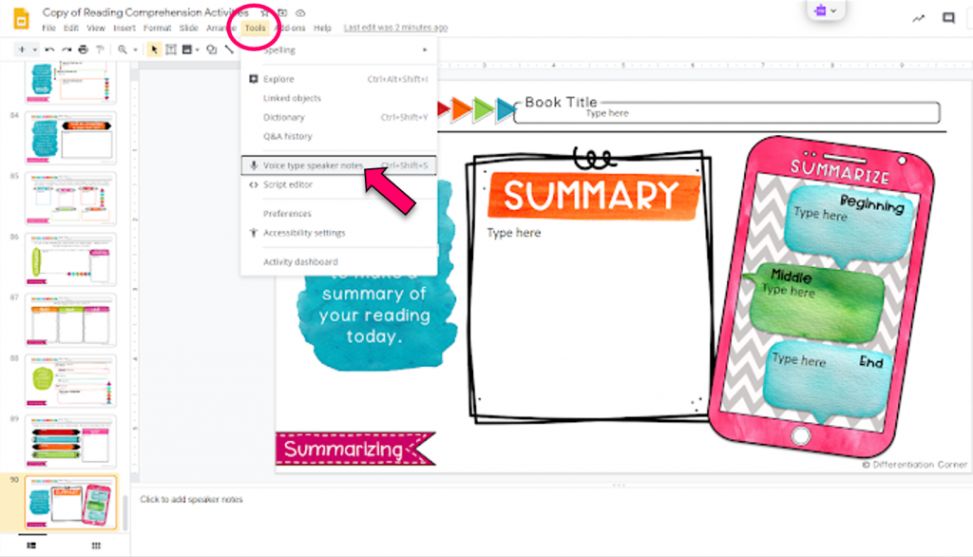
Go to the Tools tab at the top, click on Voice Type Speaker Notes from the drop down menu. The student will then need to copy and paste the text into the desired text boxes.
Click here to check out these reading comprehension activities printables & Google Slides.
Adding Timers & Videos to Google Slides
This is quite possibly the best tip for managing remote learning I have found! We will be embedding a video from YouTube for this one. Just imagine the learning possibilities here! My district blocks YouTube on student devices, but not teacher devices. So this works for me when I am sharing my screen on Zoom or Google Meet. This would not work on my students devices for a word sort or similar learning activity. (insert sad face)
First, click on the insert tab, then click on video. I usually just search for a video right here. If you have a favorite timer video, you can enter the URL/web address. {Experienced teacher tip- PREVIEW YOUR VIDEOS! That is all I can say in writing. If you just need to know more, you will have to come over for snacks and story time.} After you click on a video and click the blue select you will be given the option to mute the audio or have the sound playing. I love the option to mute the sound! It saves so much time scrolling through videos looking for timers with no audio!
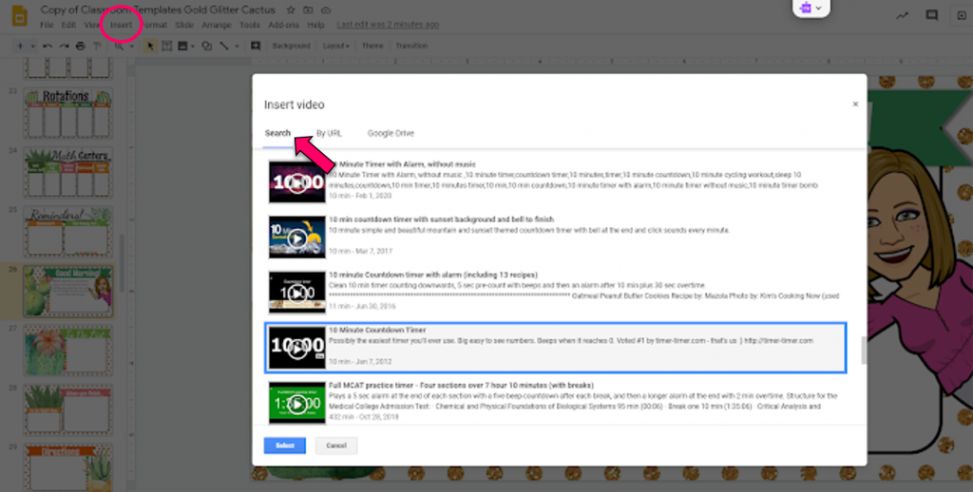
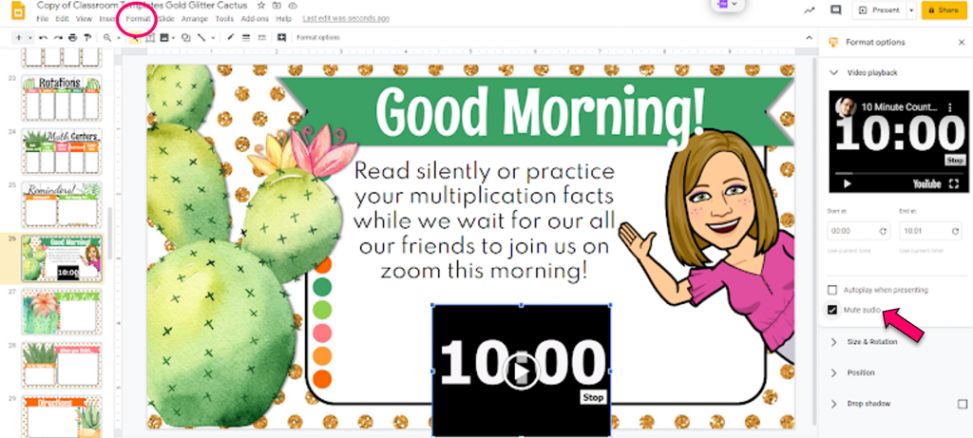
You can use this tip for adding any educational video from YouTube you want to show your class, not just timers!
I hope this helps you save some of your valuable time in creating interactive Google Slides for your classroom this year whether we are distance learning or in person.
If you are looking for Google Slides premade classroom templates like I used for the example in this blog post to save you even more time, I have a few themed sets ready to go in my Teachers Pay Teachers store. Click here to check them out!
If you would like to save this post to read again later, pin the image below! Thanks for reading!
